
| 일 | 월 | 화 | 수 | 목 | 금 | 토 |
|---|---|---|---|---|---|---|
| 1 | 2 | 3 | 4 | 5 | ||
| 6 | 7 | 8 | 9 | 10 | 11 | 12 |
| 13 | 14 | 15 | 16 | 17 | 18 | 19 |
| 20 | 21 | 22 | 23 | 24 | 25 | 26 |
| 27 | 28 | 29 | 30 |
- br 태그
- padding 속성
- not 의사클래스
- height속성
- go live
- 일반 형제 결합자
- css
- RGBA
- focus 의사클래스
- html tag i
- iframe
- id 선택자
- background-color 속성
- i 태그
- html
- Live Server
- 자식결합자
- sup태그
- tag html
- 전체 선택자
- 임베디드
- Checked 의사 클래스
- reveal in file explorer
- html 태그
- 인접 형제 결합자
- iframe 태그
- width속성
- sub태그
- 아두이노
- RGB
- Today
- Total
목록Framer Motion/개념정리 (12)
so woon!
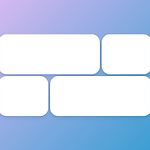 [FRAMER MOTION] popup
학습일 : 2023. 05. 16 popup창을 만들어 볼텐데 먼저 스타일링부터 하고 import { styled } from "styled-components"; import { motion } from "framer-motion"; import { useState } from "react"; // style const Wrapper = styled(motion.div)` height: 100vh; width: 100vw; align-items: center; display: flex; flex-direction: row; justify-content: center; background: linear-gradient(135deg, rgb(252, 191, 248), rgb(21, 151, 203)); ..
학습일 : 2023. 05. 16 layout 사용하기 element에 layout prop을 주게 되면 element의 layout이 바뀔 때 알아서 animate가 된다. 만약 css 때문에 layout이 바뀐다면 알아서 animation이 만들어질 것이다. 위 코드대로라면 center부터 flex-start까지의 animation 말이다. Circle component에 layout 을 써보도록 하겠다. import { styled } from "styled-components"; import { motion } from "framer-motion"; import { useState } from "react"; // style const Wrapper = styled(motion.div)` heig..
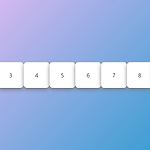 [FRAMER MOTION] AnimatePresence + 슬라이더 만들기
학습일 : 2023. 05. 15 AnimatePresence는 component인데, ReactJS App에서 사라지는 component를 animate한다. 예를 쉽게 들자면 버튼을 클릭했을 때 사라지는 박스가 있는데, 사라질 때 좀 더 느리게 사라지던지, 회전하면서 사라지던지 등등의 애니메이션을 설정하겠다는 뜻이다. AnimatePresence의 규칙 1. visible 상태여야 함. {showing ? : null} 이런식으로 적으면 안된다는 뜻. 2. AnimatePresence 내부에는 조건문이 있어야 함. {showing ? : null} 이런식으로. AnimatePresence는 안쪽에 조건문에서 나온 컴포넌트에서 나타나거나 사라지는 게 있다면 그것을 animate할 수 있도록 해준다. {..
학습일 : 2023. 05. 14 font awesome 등의 사이트에서 원하는 로고 또는 아이콘을 고르고 svg탭에서 코드를 복사 해서 Wrapper 안에 붙여주고 스타일링을 해준다. 모든 svg는 path를 가지고 있고, path는 fill을 가지고 있다. 애니메이션 적용을 위해 path에도 그냥 를 쓰면 안되고 로 바꾸어 주어야 한다. import { styled } from "styled-components"; import { motion } from "framer-motion"; // style const Wrapper = styled(motion.div)` height: 100vh; width: 100vw; display: flex; justify-content: center; align-it..
학습일 : 2023. 05. 14 useScroll을 사용하게 되면 스크롤의 MotionValue를 얻을 수 있다. 사용하기 위해 useScroll을 import 해준다. import { useScroll } from "framer-motion"; useScroll이 넘겨주는 두가지는 1. scrollX, scrollY 2. scrollXProgress, scrollYProgress 스크롤시 배경색 (서서히) 변화시키기 scrollY는 픽셀 단위인 수직 스크롤이 될 것이다. (픽셀 단위로 스크롤 간격을 줄것임.) scrollYProgress는 0과 1사이 값이고 (0은 끝이고 1은 시작. 반대일수도 있음) 스크롤 위치에 따라 서서히 배경색이 바뀜 import { styled } from "styled-c..
학습일 : 2023. 05. 13 useMotionValue 는 애니메이션 내의 수치를 트래킹(추적)하고자 할 때 사용할 수 있다. 예를 들면 아래 코드에서는 motion.div의 x좌표를 추적하고 있다. import{ motion, useMotionValue } from "framer-motion" export function MyComponent() { const x = useMotionValue(0) return } 유저가 왼쪽으로 드래깅하는지, 오른쪽으로 드래깅하는지의 여부를 알고 싶을 때 사용할 수 있을 것이다. 값을 추적하기 위해서는 useMotionValue를 import 해주어야 하고 style={{ x }}를 써줘서 useMotionValue와 style의 x를 연결해주도록 한다. sty..
학습일 : 2023. 05. 12 이번에는 드래그에 제약을 걸어보도록 하겠다. 저번글까지를 보면 그냥 drag 라는prop을 전달하여 범위에 제약 없이 그냥 튕겨나가는 것을 볼 수 있었다. drag="x" or drag="y" 그냥 drag가 아닌 drag="x" 를 작성해주게 되면 x축으로만 드래그 할 수 있게 되고, drag="y" 를 작성해주게 되면 y축으로만 드래그 할 수 있게 된다. drag="x"를 작성 function App() { return ( ); } export default App; 결과 y축으로는 이동이 잠기게 되고 이렇게 하면 x축안에 갇혀있게 된다. 하지만 여전히 x축 안에서는 화면 밖으로 날라가게 된다. drag="y"를 작성 function App() { return ( )..
학습일 : 2023. 05. 11 이번에는 을 만들어 보고자 한다. 우선 네모 안에서 드래깅 되는 것 말고 전체 영역에서 드래깅을 할 수 있도록 할텐데, 방법은 너무 간단하다. drag prop만 전달해주면 끝남. mport { styled } from "styled-components"; import { motion } from "framer-motion"; // style const Wrapper = styled.div` height: 100vh; width: 100vw; display: flex; justify-content: center; align-items: center; `; // 박스 const Box = styled(motion.div)` width: 200px; height: 200px..