
| 일 | 월 | 화 | 수 | 목 | 금 | 토 |
|---|---|---|---|---|---|---|
| 1 | 2 | 3 | ||||
| 4 | 5 | 6 | 7 | 8 | 9 | 10 |
| 11 | 12 | 13 | 14 | 15 | 16 | 17 |
| 18 | 19 | 20 | 21 | 22 | 23 | 24 |
| 25 | 26 | 27 | 28 | 29 | 30 | 31 |
- RGBA
- i 태그
- focus 의사클래스
- background-color 속성
- br 태그
- 아두이노
- tag html
- 인접 형제 결합자
- html
- reveal in file explorer
- width속성
- not 의사클래스
- html 태그
- 전체 선택자
- height속성
- go live
- Live Server
- 자식결합자
- iframe 태그
- id 선택자
- sup태그
- RGB
- 임베디드
- sub태그
- Checked 의사 클래스
- css
- 일반 형제 결합자
- padding 속성
- iframe
- html tag i
- Today
- Total
so woon!
[REACT] Drag and Drop - 여러개의 보드에서의 재정렬 + snapshot의 isDraggingOver 본문
[REACT] Drag and Drop - 여러개의 보드에서의 재정렬 + snapshot의 isDraggingOver
xowoony 2023. 5. 1. 01:32학습일 : 2023. 05. 01
이번에는 여러개의 보드를 넘나들어 이동하여 재정렬을 할 수 있도록
구현해보고자 한다.
-로직-
1. source board에서 item을 제거
2. target board로 가서 그곳에 item을 추가해준다.
<App.tsx>
서로 다른 보드 넘나들어서 재정렬하기
주석 참고
function App() {
  const [toDos, setToDos] = useRecoilState(toDoState);
  // onDragEnd : 드래그가 끝났을 때 실행되는 함수
  // destination : 드래그 끝나는 시점의 도착지 정보
  // source : 드래그 시작 정보 - 움직임을 시작한 아이템의 index, droppableId를 알려줌
  const onDragEnd = (info: DropResult) => {
    console.log(info);
    const { destination, draggableId, source } = info;
    // destination이 정의되지 않았을 경우 그대로 리턴
    if (!destination) return;
    // ★ 같은 보드 내에서 재정렬하기 ★
    if (destination?.droppableId === source.droppableId) {
      setToDos((allBoards) => {
        // source의 droppableId로부터 array를 복사하는 과정
        const boardCopy = [...allBoards[source.droppableId]]; // toDo or Doing or Done의 array를 복사한다.
        // 1. source.index에서 아이템을 삭제한다.
        boardCopy.splice(source.index, 1); // source.index 즉 시작시점부터 1개만 지움
        // 2. item을 다시 destination.index에 넣고, 아무것도 추가하지 않고 item을 넣는다.
        // (item은 draggabledId 이다.)
        // (때때로 destination이 없을 수도 있다. 유저가 그자리에 그대로 둘 경우엔)
        boardCopy.splice(destination?.index, 0, draggableId);
        // boardCopy와, 이전의 State와, 다른 Boards를 모두 리턴해주어야 함
        // oldToDos는 object 였다.
        // oldToDos에서 모든걸 리턴할건데, 보드 딱 하나만 다른걸로 대체
        return {
          ...allBoards, // 다른 모든 board들을 가져오고
          [source.droppableId]: boardCopy, // 새로운 변형된 board. (복사본임)
        };
      });
    }
    // ★ 서로 다른 보드 넘나들어서 재정렬하기 ★
    if (destination.droppableId !== source.droppableId) {
      setToDos((allBoards) => {
        // 1. Source board의 복사본을 만든다. - 시작지점
        // (모든 보드를 가져와서 거기에서 source.droppableId를 복사)
        const sourceBoard = [...allBoards[source.droppableId]];
        // 2. destinationBoard 선언 - 끝나는 지점
        const destinationBoard = [...allBoards[destination.droppableId]];
        // 3. sourceboard 삭제하기
        sourceBoard.splice(source.index, 1);
        // 4. 삭제한걸 destination board에 넣어줌
        // (draggableId를 움직임이 끝나는 board의 index에 넣어줌)
        destinationBoard.splice(destination?.index, 0, draggableId);
        return {
          ...allBoards,
          [source.droppableId]: sourceBoard,
          [destination.droppableId]: destinationBoard,
        };
      });
    }
  };

  return (
    <DragDropContext onDragEnd={onDragEnd}>
      <Wrapper>
        {/* Object.keys(toDos) 까지 하면 board의 모든 Id를 받아왔음. */}
        {/* 그럼 그 boardId로 map을 이용해 새로운 board들을 만들어준다. */}
        <Boards>
          {Object.keys(toDos).map((boardId) => (
            <Board key={boardId} toDos={toDos[boardId]} boardId={boardId} />
          ))}
        </Boards>
      </Wrapper>
    </DragDropContext>
  );
}

export default App;
<Board.tsx>
보드를 넘나들 때 옮기는게 조금 어려운 감이 있는 이유가
우리가 드롭할 때 받는 역할을 하는 건 div 뿐이기 때문
일단 div 영역 배경을 빨간색으로 표시해보면
function Board({ toDos, boardId }: IBoardProps) {
  return (
    <Wrapper>
      <Title>{boardId}</Title>
      <Droppable droppableId={boardId}>
        {(magic) => (
          // 앞으로 3가지 보드를 만들 것이다.
          // 우리가 드롭할 때 받는 역할을 하는 건 div 뿐임
          <div style={{backgroundColor:"red"}} ref={magic.innerRef} {...magic.droppableProps}>
            {toDos.map((toDo, index) => (
              <DragabbleCard key={toDo} toDo={toDo} index={index} />
            ))}
            {magic.placeholder}
          </div>
        )}
      </Droppable>
    </Wrapper>
  );
}

export default Board;
실행결과
드롭할 수 있는 영역이 매우 협소하며,
아무런 아이템이 없는 보드에서는
맨 위부터 드롭해주어야 함을 알 수 있다.
이제 board를 떠날 때 색상을 바꿔야 할 타이밍과
destination board에 도착해서 색상을 바꿔야 할 타이밍을
어떻게 정할지 알아볼 것이다.
source(드래그 시작점) 과
destination (드롭하는 지점) 모두 색상에 변화를 줘보도록 하자.
일단 이전에 있던 div 부분을 Area로 이름을 변경하였고,
스타일을 주었고
이 droppable area를 맨 아래까지 이어지게 해보면
Area의 부모인 Wrapper를
Display flex
flex-direction column 을 주고
Area로 가서
flex-grow에 1을 준다.
그러면
이처럼 드롭할 수 있는 영역이 확대가 된다.
이번에는 내가 보드에 도착하는지, 떠나는지에 따라서
area의 색상을 변경해주고자 하는데,
그러려면 argument 하나를 더 넘겨주어야 하는데,
그것은 바로 snapshot이다.
(magic으로 적어준 argument는 원래 이름은 provided이다.)
snapshot에서 오른쪽 클릭해서 타입의 정의를 보면
무엇을 얻을 수 있을지 볼 수 있다.
export interface DroppableStateSnapshot {
    isDraggingOver: boolean;
    draggingOverWith: DraggableId | null | undefined;
    draggingFromThisWith: DraggableId | null | undefined;
    isUsingPlaceholder: boolean;
}
isDraggingOver에 대한 boolean을 받을 수 있다.
이건 유저가 보드 위로 드래그 해서 들어오고 있는지를 알려줄 수 있을 것이다.
<Board.tsx>
Area에게 prop을 만들어 준다.
isDraggingOver={snapshot.isDraggingOver}
Area는 그냥 div라서 아직 이 prop을 인식하지 못한다.
그러니 Area 스타일 컴포넌트에게 isDraggingOver라는 prop을 받을거라고 말해주도록 한다.
또한 isDraggingOver는 snapshot으로부터 오기에 snapshot.isDraggingOver 로 작성해준다.
<Area
     isDraggingOver={snapshot.isDraggingOver}
그리고
Area 의 스타일을 이렇게 주어 드래그 해서 보드 위로 올라오는지 아닌지에 따라서
배경색을 다르게 설정해주도록 한다.
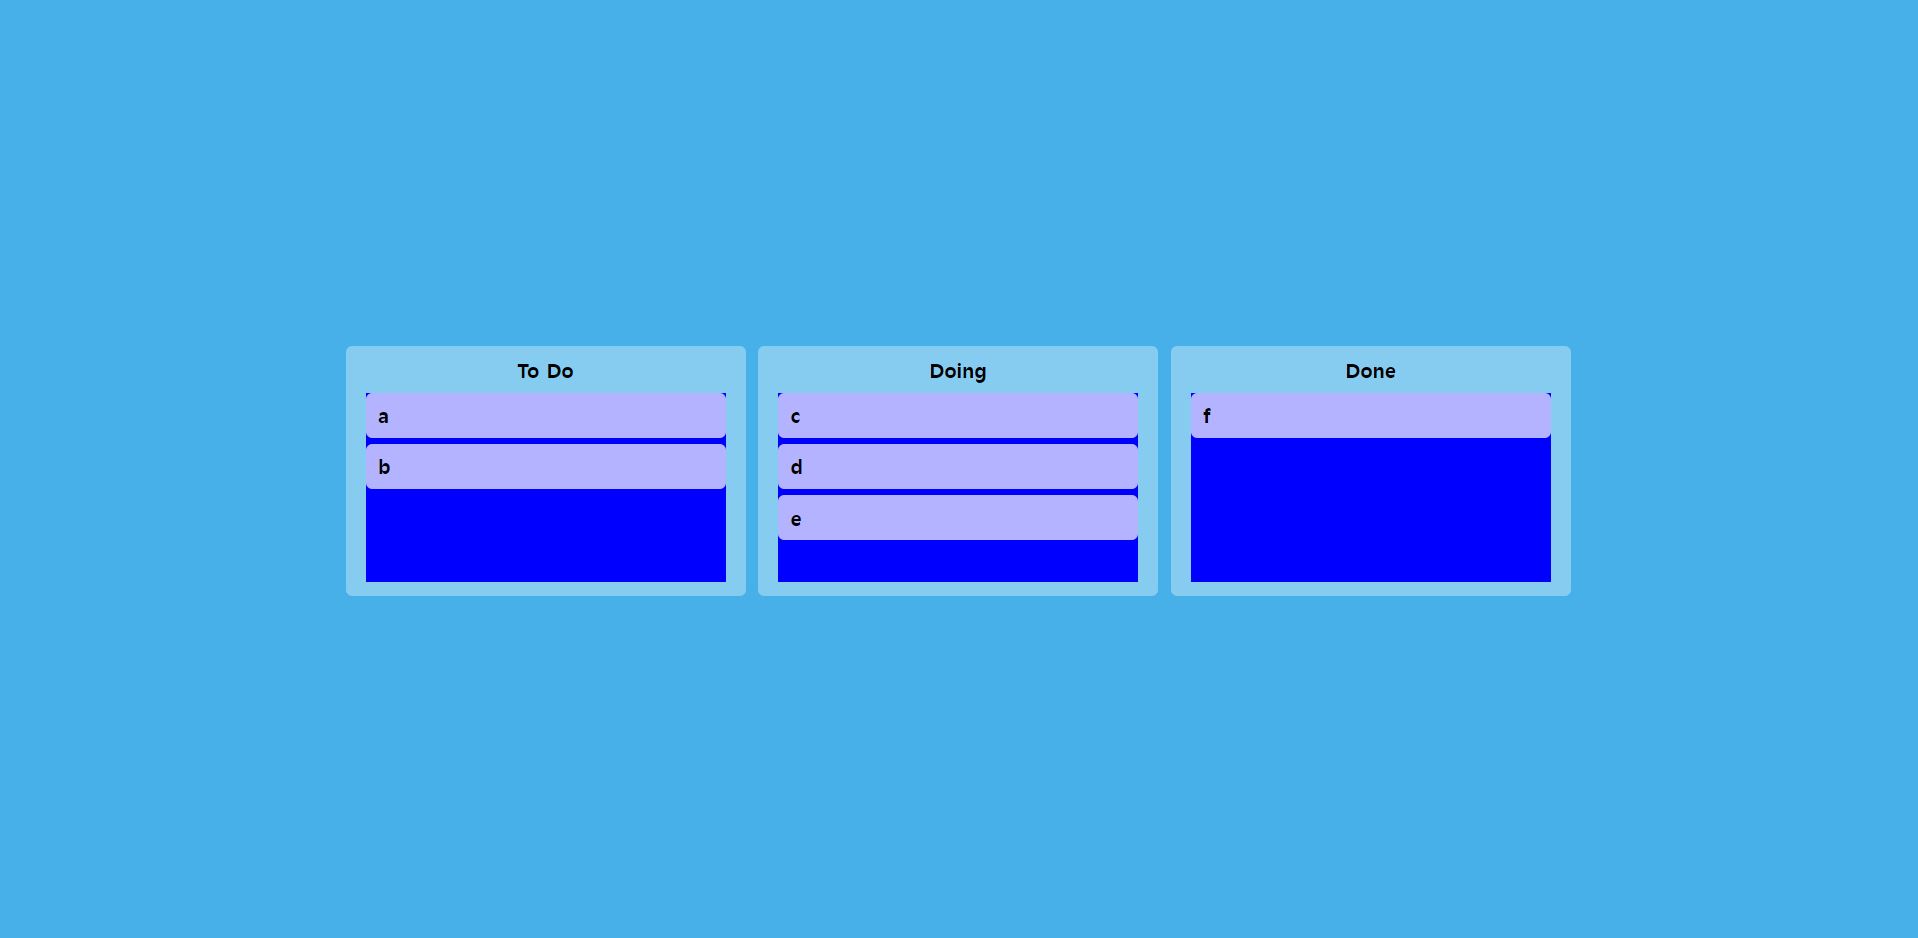
(드래그 해서 보드 위로 오면 핑크색으로 설정하겠다. 반대일 때는 파란색)
background-color: ${(props) => (props.isDraggingOver ? "pink" : "blue")};
실행결과
카드를 다른 보드로도 넘겨서 재정렬 할 수 있게 되었고,
카드의 이동에 따라서 보드의 색상도 변경됨을 볼 수가 있다.
'ReactJS > 개념정리' 카테고리의 다른 글
| [REACT] Drag and Drop - snapshot의 isDragging (0) | 2023.05.02 |
|---|---|
| [REACT] Drag and Drop - snapshot의 draggingFromThis (0) | 2023.05.01 |
| [REACT] Drag and Drop - 같은 보드 내에서 재정렬 (0) | 2023.04.30 |
| [React] Drag and Drop - multi board 만들기 (0) | 2023.04.29 |
| [REACT] Drag and Drop - onDragEnd, 재정렬 + React.memo() (0) | 2023.04.28 |
